3X-UI
Description
3X-UI provides a simple web interface for configuring and managing the V2ray (xray) proxy server. It supports various protocols, including VLESS, VMess, Shadowsocks, Socks, HTTP/HTTPS, QUIC, and more.
Getting started
3X-UI is installed with the image and is automatically enabled when the server boots.
To access the web interface, use the credentials sent to you by email.
Additionally, the login credentials can be found on the server in the file:
/root/.app_credentials
To access this file, you will need to log in to the server via SSH. You can connect to the server via SSH:
- With an SSH key, if this option is enabled before a server is created
- With the
rootuser password sent by mail when server is activated
Adding/Changing domain
If you wish to use your own domain or subdomain to access the 3X-UI web interface, you will need to log on to the server via SSH under the root user and run the command:
add_domain
You will be prompted to enter a domain or subdomain in the format subdomain.example.com.
Make sure your domain exists and is pointed to the IPv4 address of your server!
When the script finishes, a Let's Ecnrypt certificate will be issued for the specified domain or subdomain and the web-interface will be available at https://example.com/wX6ItjnHc4, where example.com is the previously specified domain (subdomain).
Profiles
After installation, you'll find 4 inbound connections in the 3X-UI web panel. Here's what each one does:
-
XHTTP — The most advanced connection type. Traffic is disguised as regular HTTP requests, making it virtually indistinguishable from normal web browsing. Note: requires Xray core on the client side. Apps based on sing-box will not work with this type.
-
Reality (VLESS + Reality) — The fastest connection type. Delivers maximum performance by skipping TLS termination on the server — instead, it borrows a certificate from a real website. Best choice when speed is your priority.
-
WebSocket (VLESS + WS + TLS) — Slightly slower than Reality due to an extra encryption layer, but offers more reliable traffic obfuscation. A good balance between speed and stealth.
-
Trojan — A battle-tested protocol with the widest compatibility. Works with virtually any client app. Disguises traffic as regular HTTPS. If other protocols don't work with your device or app, Trojan will.
Import all four connections into your client app — they will appear as separate profiles. From there, you can switch between them with a single tap. We recommend trying each one to find what gives you the best speed and access for your needs.
Connecting to proxy
| Windows/Linux | macOS | Android | iOS |
|---|---|---|---|
 | | |  |
For quick configuration, you can export the inbound's URL (3) or generate a QR code (4):
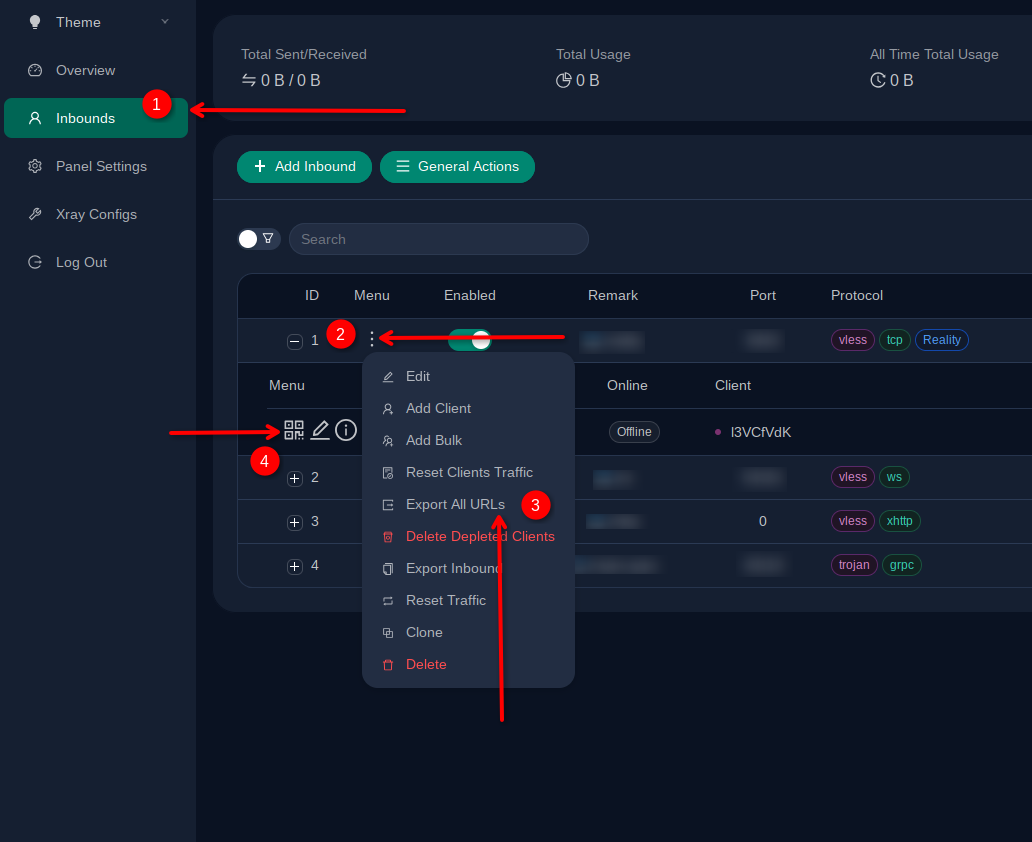
Simply copy the URL from the pop-up window to your clipboard. On most clients, you can add a connection by selecting Add profile from clipboard or Import profile from clipboard.
Since there are many variations of clients for different operating systems, below we will give an example of setting up a client for Windows and Android. However, for other OS the algorithm will be similar.
Desktop client (Throne)
- Export your inbound URL and copy to the clipboard as described above.
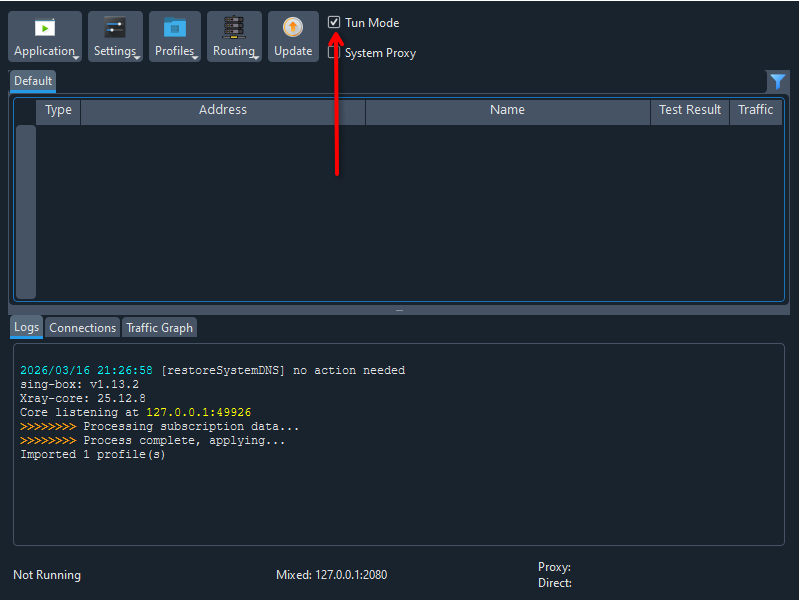
- Run Throne client as Administrator and enable Tun Mode.
- Click on Application button and then click on line Add profile from clipboard. A new item should appear in the list of connections.

- Highlight the added connection line with your mouse and press Enter to establish connection. Or click on it with right mouse button and then click on Start entry.
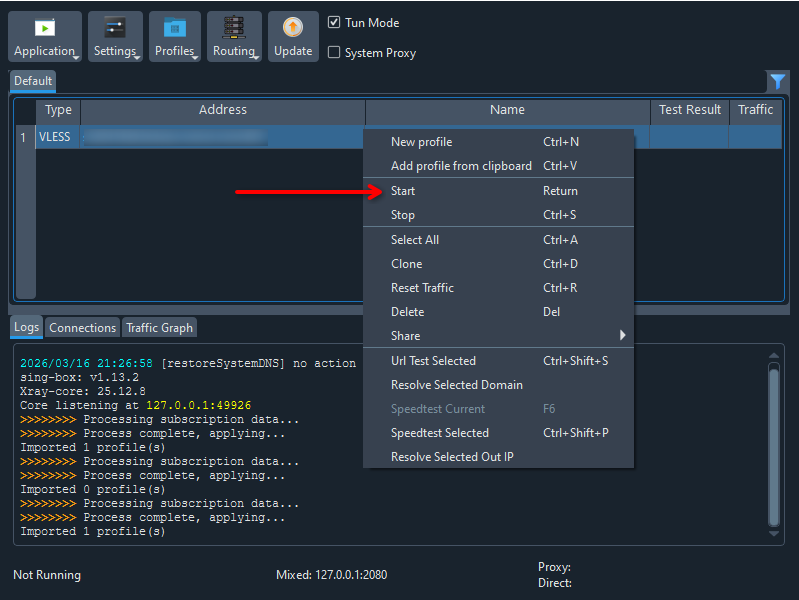
- To disconnect from the server, please similarly right-click on the connection line and then click Stop.
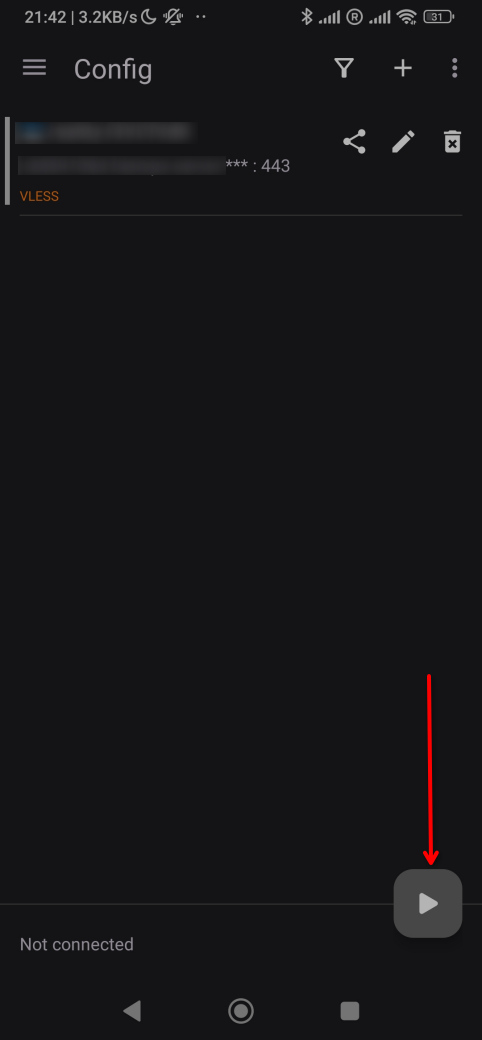
Mobile client (v2rayNG)
- Generate a QR code as described above.
- Run v2rayNG client, click the "+" button in the top right corner.
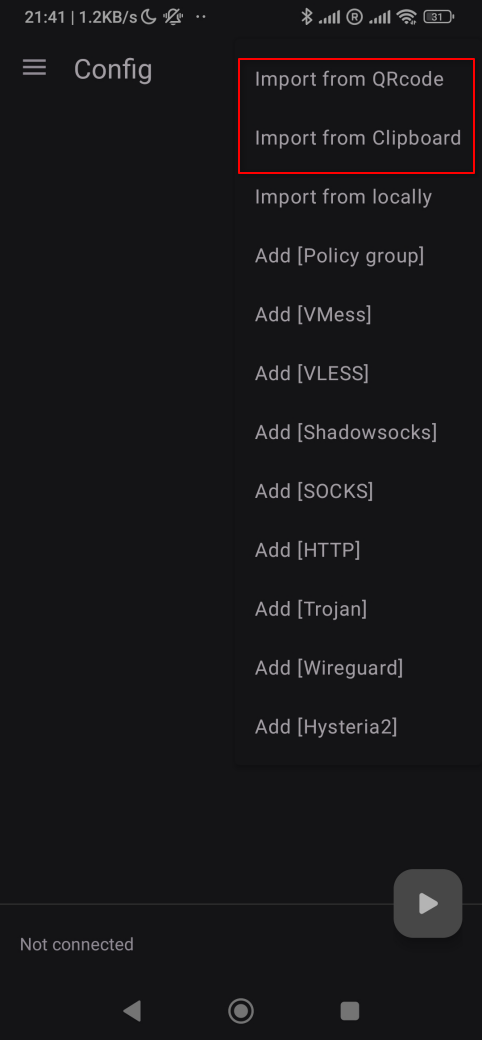
- Scan the QR code. A new item should appear in the list of configurations.
- After that, select the added configuration and click the start button.
Software installed
| Name | License |
|---|---|
| 3X-UI | GNU GPLv3 |
| Nginx | BSD-2-Clause License |
Useful links
For more information about the installed packages, please refer to their official documentation: