WireGuard
Description
With this image, your server becomes a ready-to-use WireGuard VPN server with a web interface for management. Through this VPN, your devices can access the Internet as well as all private networks connected to the server.
WireGuard is an extremely simple, yet fast and modern VPN using the latest cryptography technologies. It aims to be faster, simpler, more compact and more useful than IPsec. It should be significantly more performant than OpenVPN.
The WireGuard UI is a simple web-based management interface for WireGuard.
Getting started
WireGuard and the web management interface are installed with the image and are automatically enabled when the server boots.
After the image is installed, the WireGuard web interface will be available at https://example.com, where example.com is the hostname of your server.
To access the web interface, use the credentials sent to you by email.
Additionally, the login credentials can be found on the server in the file:
/root/.app_credentials
To access this file, you will need to log in to the server via SSH. You can connect to the server via SSH:
- With an SSH key, if this option is enabled before a server is created
- With the
rootuser password sent by mail when server is activated
Changing domain
If you wish to use your own domain or subdomain to access the Wireguard web interface, you will need to log on to the server via SSH under the root user and run the command:
add_domain
You will be prompted to enter a domain or subdomain in the format subdomain.example.com.
Make sure your domain exists and is pointed to the IPv4 address of your server!
When the script finishes, a Let's Ecnrypt certificate will be issued for the specified domain or subdomain and the web-interface will be available at https://example.com/, where example.com is the previously specified domain (subdomain).
Connecting to VPN
To connect, you must first create a new client in the WireGuard web interface. To do this, click on the New Client button.
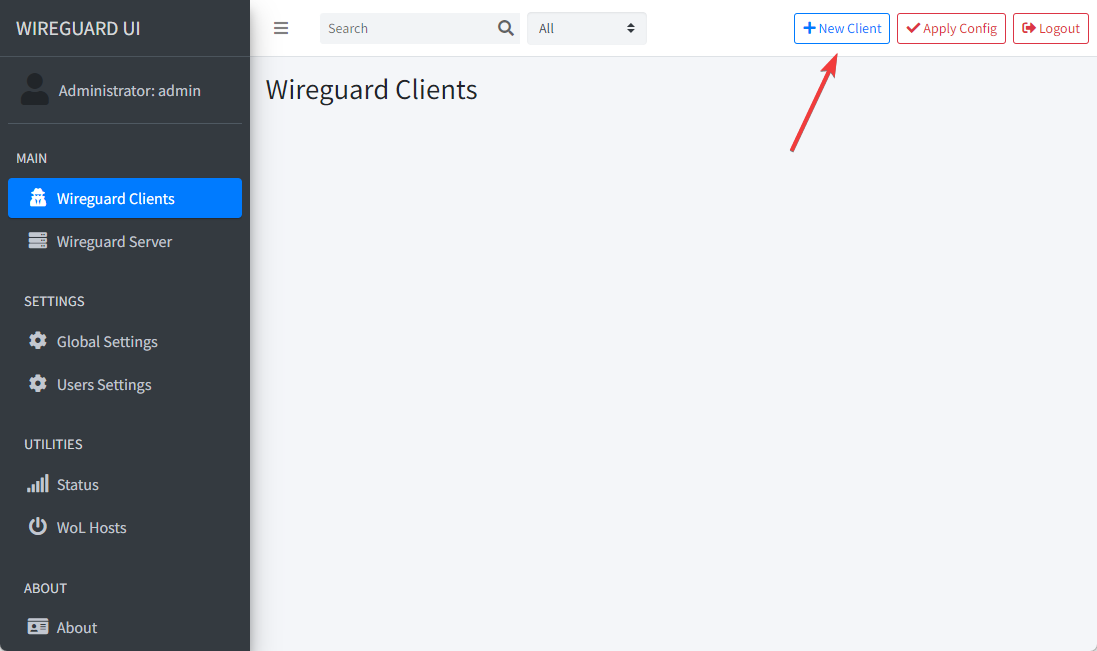
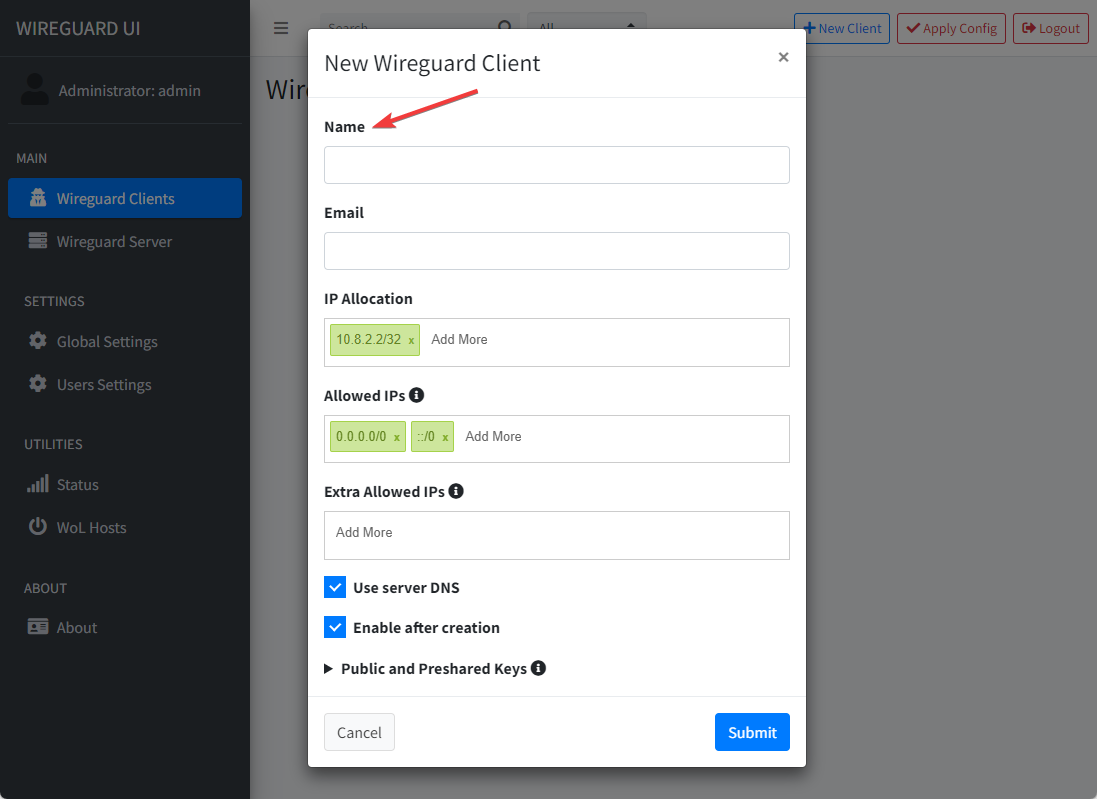
In this menu, fill in only the Name field (the other fields can be left blank) and click the Submit button.
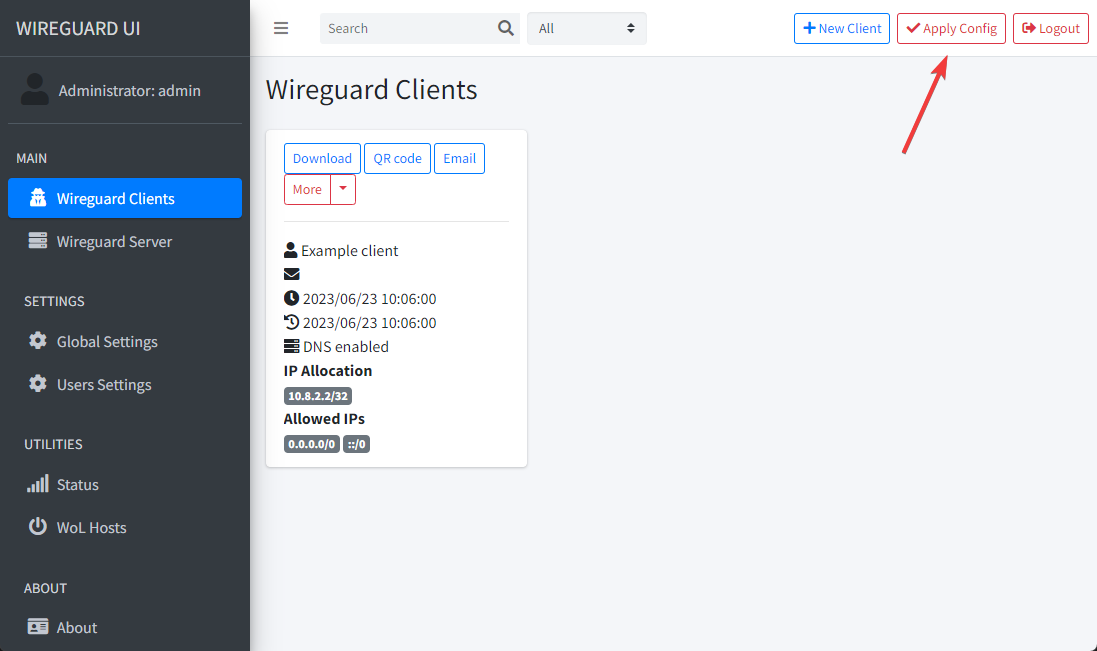
After adding clients or making changes in the web interface, you must click the Apply Config button. Otherwise, the changes will not be accepted and the new clients will not be able to connect.
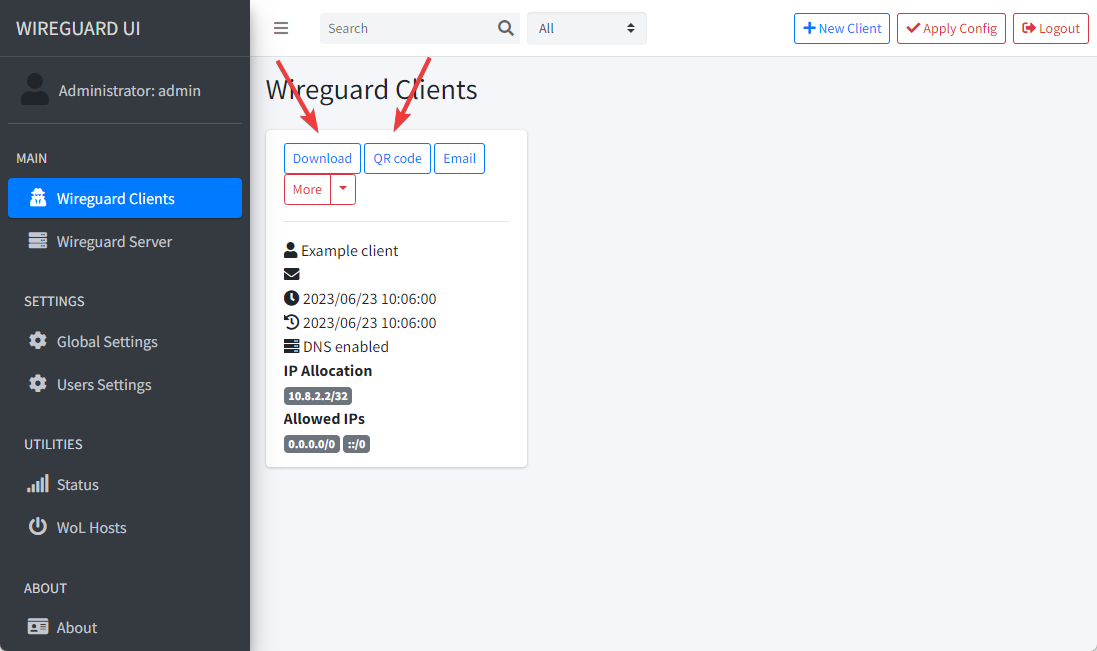
You can now use the QR-code button to generate a QR code that can be scanned with the WireGuard app for Android or iOS. Or you can download the client configuration to connect from a PC or Mac.
You can download client applications to connect to your Wireguard VPN by following the links:
| PC - Windows/Mac | Android | iOS |
|---|---|---|
 |  |  |
 |  |
Software installed
| Name | License |
|---|---|
| WireGuard | GPLv2 |
| wireguard-ui | MIT |
| Caddy | Apache License 2.0 |
Useful links
For more information about the installed packages, please refer to their official documentation: